¶ Script editor components
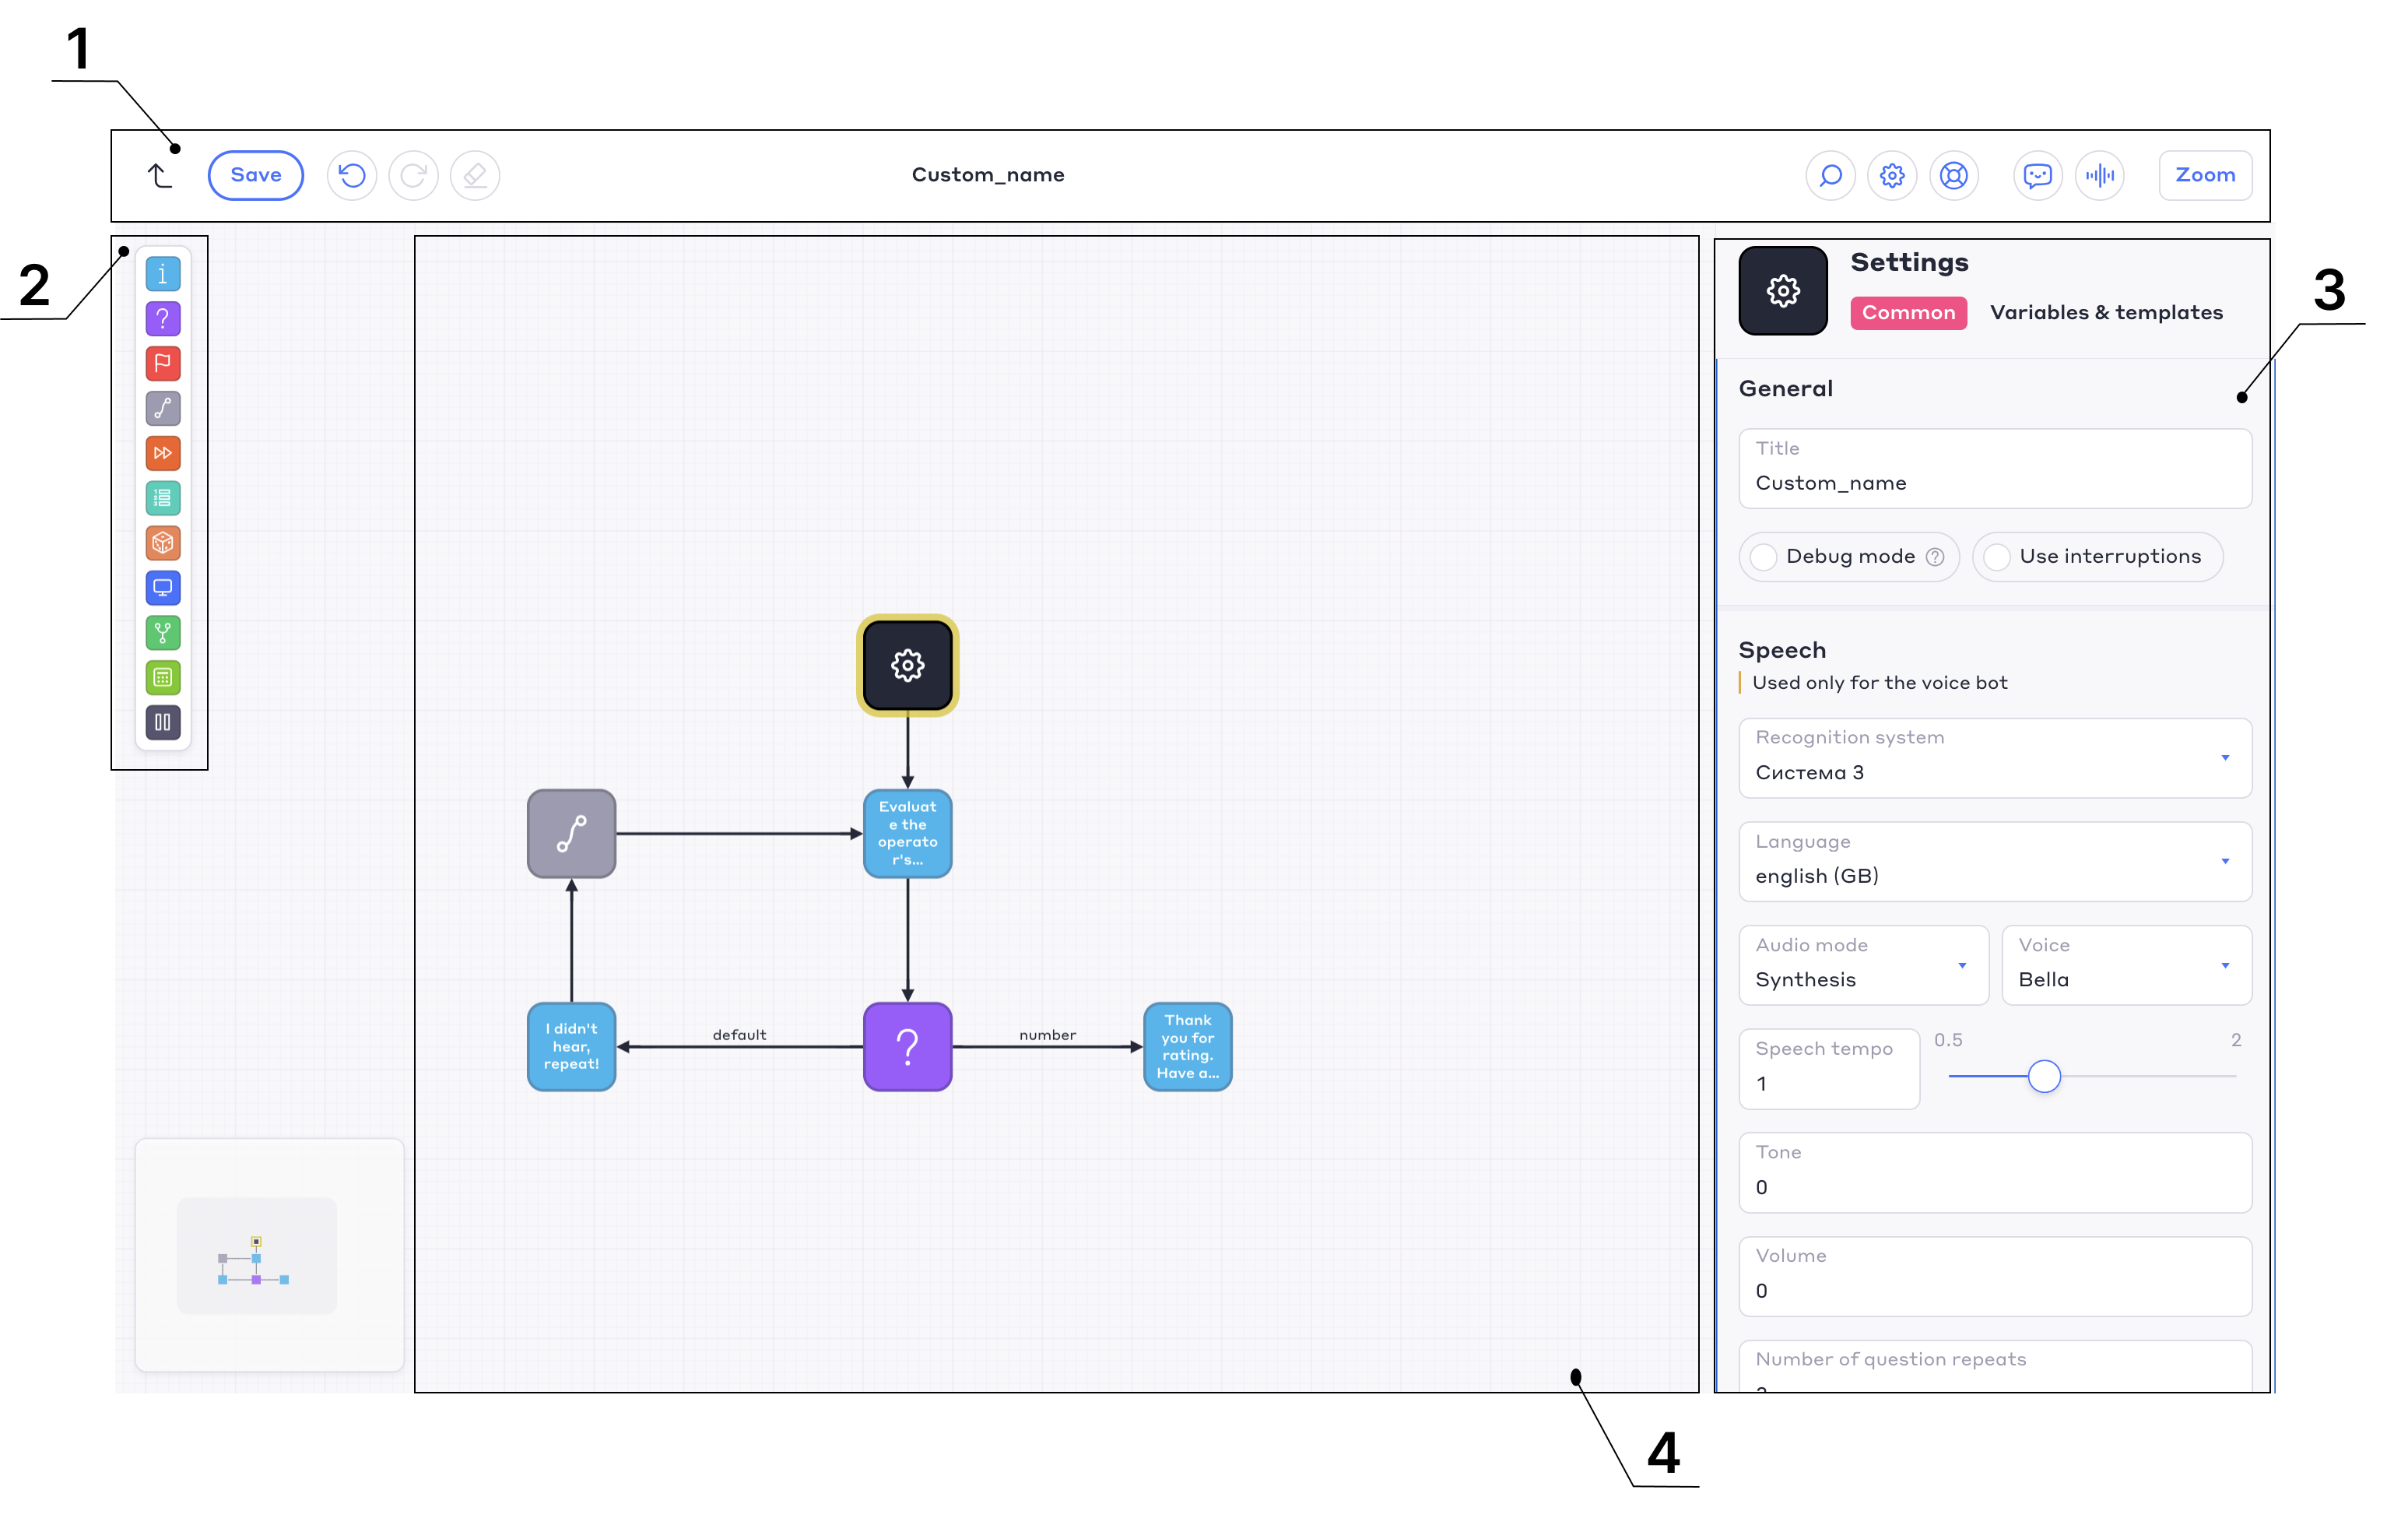
¶ 1. The control panel
Use the control panel to effectively navigate and test scenarios.

- Return to the list of scenarios.
Save the script before exiting so as not to lose the changes.
- Saving changes.
If there are errors in the block properties, the block with the error will be highlighted, and the script will not be saved.
- Cancel the completed action.
- Return of the cancelled action.
- Go to the last added block.
- Erase the selected (highlighted) elements in the workspace.
The starting block cannot be deleted.
-
The name of the script.
-
Change the scale of the scenario in the workspace.
-
Mode selection and transition to scenario testing:
- Text mode;
- Voice input.
-
Other settings:
- Create a copy of the script — create a duplicate of the script and all the agents who participate in it.
- Audio recording — search, listen, download, delete audio files that are used in the script.
- Script settings — go to the settings of the start block.
- Help — instructions for working with the script editor.
- Keyboard shortcuts are a list of keyboard shortcuts for working with a script: copying, deleting, moving blocks, canceling and repeating actions, managing groups, and creating links between blocks.
¶ 2. The toolbar
The panel contains blocks for visual scripting in the editor workspace.
¶ 3. The properties panel
The panel contains controls that set the properties of blocks and arrows.
¶ 4. Work area
Workspace is a space where scripts are created from blocks and arrows.
For the convenience of working with space, various ways of moving around the area are available:
- Scroll wheel — moves the workspace vertically. If you hold down the Shift key and turn the wheel, then the movement occurs horizontally.
- Arrow keys on the keyboard — The up, down, left and right keys allow you to move around the workspace.
- WASD — alternative keys for moving in the same way as the arrows.
- Middle mouse button — Hold down the middle mouse button and move the workspace in any direction.
- Ctrl + left mouse button — similar to moving the middle button, hold down Ctrl and the left mouse button to move.
- Minimap — in the lower left corner of the workspace there is a mini-view of the area, which displays the current visible area. To move around the workspace using the minimap, hold down the visible area with the left mouse button and move it.
¶ Script elements
The two main elements that make up the script are blocks and arrows.
The script consists of blocks that are linked using arrows. When you enter the script for the first time, only the start block is displayed.
¶ Blocks
Blocks are the main components of the script; the "bricks" from which the script is built.
| Block Name | Block Image | Block Name | Block Image |
|---|---|---|---|
| Starting block | Random | ||
| Information | Request | ||
| Question | Condition | ||
| Result | Statement | ||
| Empty | Pause | ||
| Portal | Iterative |
Read more about each block in the section Blocks.
¶ Adding a block to the script
- Click on the block icon on the toolbar.
- Move the block to the workspace by holding down the left mouse button. An arrow must be drawn manually to the added block (see the section below Arrows).
The Information, Question and Empty blocks can be pulled from any type of block in the workspace. For this:
- Click on the block from which the next block will be pulled.
- Hold down the icon of the desired block and drag it to the workspace.
- Release the unit when it is installed in the right place.
This block is already connected to the previous block by an arrow and you do not need to add an arrow to it.
A block can be inserted from an arrow that stretches to another block – then a new block will stand between the arrow and this block.
To do this, follow these steps:
- Click on the arrow from which the new block should be drawn.
- Click on the cube icon next to the title in the arrow properties window that opens.
- Select a block from the drop-down list.
- Click Add.
- Right-click on an empty space on the workspace. A menu with blocks will open.
- Select the desired block — it will immediately appear on the workspace. The added block must be connected manually with an arrow. For more information, see Arrows.
¶ Changing the block type
Does not apply to the starting block.
To convert a block of any type to a block of another type:
- Click on the desired block, the block properties panel will appear.
- Click on
 next to the block type name.
 - Select the desired block type.
When changing the block type, all data associated with this block type will be lost.
¶ Copying a block
- Click on a block or select several blocks that you want to copy in the workspace.
- Press Ctrl + C on the keyboard.
- Insert the block by pressing Ctrl + V on the keyboard. The copied blocks will appear on the workspace.
- Select the blocks that you want to copy.
- Press Command + C on the keyboard.
- Press Command + V on the keyboard. The copied blocks will appear on the workspace.
¶ Deleting a block
- Click on a block or select several blocks in the workspace.
- Press the Delete (Del) key on the keyboard. The blocks will be deleted along with the arrows entering and exiting them.
¶ Arrows
Arrows are conditions that determine how the bot's dialogue with the client develops.
The arrows connect the script blocks, show the direction of the script and determine the conditions for the transition from one block to another.
If a block in the script is not linked by arrows to other blocks, such a block will not participate in dialogues.
Each arrow has unique properties. More detailed information about the arrow properties can be found in the articles in the section Blocks.
¶ Connecting blocks with an arrow
- Install two blocks: from which the arrow will be pulled (block 1) and into which the arrow will be pulled (block 2).
- Pull out the arrow using one of the two options:
- Click on block 1, then on the arrow icon (empty block) and drag it to block 2.
- Press block 1, hold down the Shift key on the keyboard and press block 2.
¶ Determining the Start and End of an Arrow
To find out from which block an arrow originates and to which block it leads in the bot script:
- Click on the arrow you are interested in.
- Click
 in the arrow properties to find out from which block the arrow originates.
 - Click
 in the arrow properties to find out to which block the arrow leads.
¶ Removing the arrow
Click on the arrow in the workspace and press the Delete (Del) key on the keyboard.
¶ Note
A note helps you leave text comments right inside the script, for example, to explain the logic, capture an idea, or send a message to a colleague.
The note does not participate in the script and remains on the work field as a reminder or hint. It is displayed on a mini-map for easy search.
To add a note:
- Right-click on an empty place in the workspace.
- Select Note from the menu that opens. A yellow block will appear on the screen.
- Click on the notes section. An input field will open on the right side of the screen.
- Enter the text of the note.
- Move the note to the desired location, similar to how other script blocks are moved.